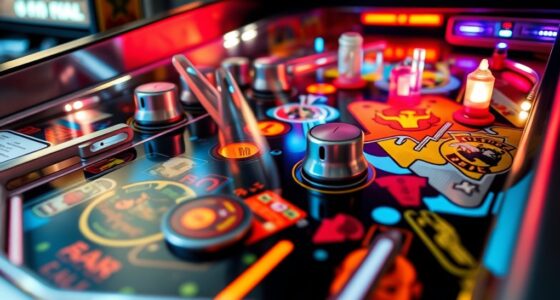
When rebuilding your pinball flipper, focus on critical parts like the spring, coil, and pivot points, which guarantee reliable action and safety. You can postpone replacing cosmetic parts, decorative hardware, or bumpers until later. Look for signs of wear or damage, such as cracks or looseness, and address those immediately. Use the right tools, prioritize major repairs, and avoid rushing, so your flipper performs perfectly. Keep going to learn more essential tips and techniques.
Key Takeaways
- Focus on critical components like springs, coil integrity, and pivot points for safe, effective flipper rebuilds.
- Cosmetic parts and hardware upgrades can be deferred; they are non-essential during initial repairs.
- Use proper tools and follow a task sequence prioritizing structural and electrical repairs first.
- Avoid common mistakes such as rushing, skipping lubrication, or neglecting inspection and adjustments.
- Regular testing, lubrication, and spring tension adjustments ensure optimal flipper performance over time.

Stern Sega Pinball Flipper Rebuild Kit
This rebuild kit is for use with the newer Sega and Stern games
As an affiliate, we earn on qualifying purchases.
As an affiliate, we earn on qualifying purchases.
What Are the Critical Parts to Rebuild a Flipper Successfully?

To successfully rebuild a flipper, you need to focus on replacing or restoring its key components. The flipper spring is crucial because it provides the necessary force to return the flipper to its resting position after each hit. Ensuring the spring is in good condition and properly installed is essential for optimal play. Additionally, pay close attention to coil alignment; misaligned coils can cause the flipper to function improperly or wear out prematurely. Correct coil placement ensures smooth, consistent movement and prevents damage to other parts. Properly restoring these parts sets a solid foundation for a successful flipper rebuild, and understanding the importance of component functionality can help guide effective repairs. Recognizing the role of proper installation is equally important to prevent issues down the line. Moreover, maintaining coil integrity helps ensure consistent performance over time.

Williams Bally Pinball Flipper Coil – FL-11630
replacement coil
As an affiliate, we earn on qualifying purchases.
As an affiliate, we earn on qualifying purchases.
Which Components Can You Skip or Replace Later Without Issues?

You don’t need to focus on non-essential cosmetic parts during your rebuild, as they won’t affect gameplay. Replacement-ready components can be swapped out later if needed, saving you time now. Optional hardware elements are also safe to skip or add later without impacting the core function of your flipper. Being aware of component odors can help identify issues that might arise later. Understanding regional flavors can also guide you in customizing your build for better overall performance and taste. Additionally, recognizing vintage audio trends can enhance your appreciation of the broader nostalgia associated with your project. Knowing which critical components are essential during initial assembly can help streamline your rebuild process and avoid unnecessary delays. Pay attention to milky nails as they can indicate underlying issues that may need addressing early on, ensuring your build remains in top condition.
Non-Essential Cosmetic Parts
Ever wonder which cosmetic parts of your flipper rebuild are truly necessary? Non-essential cosmetic parts mainly include decorative features and cosmetic enhancements that improve appearance but don’t impact function. These components, like plastic trim pieces or decorative emblems, can be skipped or replaced later without affecting gameplay or operation. If you’re on a tight budget or want to prioritize essential parts, you can leave these out initially. Replacing them later is straightforward and won’t cause issues with the core mechanics. Focus on parts that influence the flipper’s performance first, then address cosmetic enhancements or decorative features afterward. This approach saves time and money, giving you a functional rebuild before adding aesthetic touches.
Replacement-Ready Components
Many components in a flipper rebuild can be replaced or skipped initially without affecting gameplay. For example, spring replacement isn’t urgent unless the spring is broken or markedly worn. If it feels weak or doesn’t return properly, then consider swapping it out. Otherwise, you can wait until a full rebuild or maintenance. Coil inspection is also optional at this stage; if the coil tests okay with no signs of overheating, corrosion, or damage, you can leave it alone. Replacing coils prematurely isn’t necessary unless you notice performance issues. These parts are generally reliable and won’t cause immediate problems, so you can prioritize more critical repairs first. Additionally, local art exhibitions highlight community engagement and can be a good source of inspiration for customizing your pinball machine. Regular maintenance checks can help identify potential issues before they become major problems, saving time and money while ensuring your flipper functions smoothly during gameplay. Performing visual inspections for signs of wear patterns can be a helpful step in determining when a replacement might be beneficial, especially since flipper parts are designed to withstand repeated use but can still wear out over time.
Optional Hardware Elements
Certain hardware elements in a flipper rebuild can be deferred or replaced later without impacting gameplay. These optional components often serve to enhance longevity or aesthetics but aren’t essential for operation. For example, leaf springs can be upgraded or swapped out later if desired, without affecting the core flipper function. Rubber bumpers, while helpful for protecting parts and improving game feel, aren’t critical during initial rebuilds. You can also consider skipping upgrades like decorative posts or cosmetic hardware until later. Additionally, selecting high-quality measurement tools, like precise test equipment, can help ensure that your rebuild maintains optimal performance over time. Implementing durable materials in your assembly can also reduce the frequency of repairs and replacements. Incorporating natural materials when designing your workspace can also make future adjustments more straightforward and environmentally friendly. Being mindful of hardware compatibility can save time and reduce frustration during upgrades or repairs later on. Moreover, planning with future upgrades in mind can make ongoing maintenance more manageable and efficient.
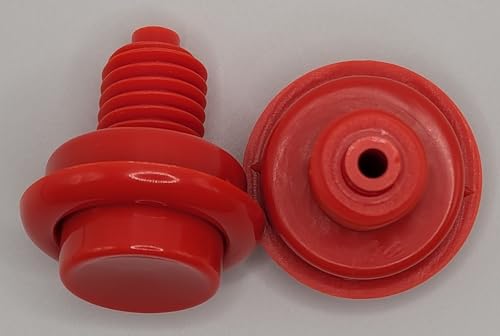
Pinball Machine Cabinet Flipper Buttons, Opaque, 1 1/8" Shaft with Spring, Set of 2 (RED)
INCLUDES SPRING, SET OF 2!
As an affiliate, we earn on qualifying purchases.
As an affiliate, we earn on qualifying purchases.
How to Spot Worn or Damaged Parts That Need Immediate Attention?

Look closely for visible cracks or chips on the parts, as these can quickly worsen if ignored. Check for excessive wear or looseness, which indicates the component isn’t functioning properly. Addressing these issues early can prevent bigger problems down the line. Additionally, recognizing cosmetic imperfections can help you identify parts that may need replacement before they cause further damage. Regular inspection for material degradation ensures that compromised parts are replaced promptly, maintaining the integrity of your rebuild. Staying aware of industry standards can also guide you in assessing whether a part still meets quality expectations. Being familiar with protective coatings can further help identify corrosion or deterioration signs that require attention.
Visible Cracks or Chips
Cracks or chips on your flipper can indicate serious damage that demands immediate attention. These imperfections compromise the device’s functionality and may worsen if left untreated. Look closely for visible damage, especially around contact points and edges. Small chips can often be repaired with cosmetic repairs to restore the surface, but larger cracks might require more extensive fixes. Damaged areas should be addressed before attempting aesthetic upgrades, as they can worsen over time. Ignoring these signs risks further deterioration of the part or even total failure. Regular inspection helps catch issues early, saving you money and frustration later. Remember, a well-maintained flipper not only functions better but also looks cleaner and more professional. Address visible cracks or chips promptly to ensure peak performance.
Excessive Wear or Play
Excessive wear or play in your flipper signals that the parts are deteriorating and may soon fail if not addressed. You should perform a wear assessment regularly to identify components with excessive play beyond the manufacturer’s play tolerance. Pay close attention to the flipper’s pivot points, coil sleeves, and linkage joints. If these parts move more than recommended, they’re likely worn out. Use the table below to evaluate your flipper’s condition:
| Part | Wear Assessment | Play Tolerance |
|---|---|---|
| Pivot points | Visible wear or looseness | Up to 0.010 inches |
| Coil sleeves | Cracks or excessive looseness | Minimal movement (0.005 in) |
| Linkage joints | Excessive slack | Slight free play only |
Address worn parts immediately to prevent further damage.

4 Pack of 1-1/2" Standard Size Flipper Rubber Rings for Most Pinball Machines
4 1-12" Flipper Rings that fit 2" flipper bats
As an affiliate, we earn on qualifying purchases.
As an affiliate, we earn on qualifying purchases.
What Tools and Supplies Do You Need for Your Flipper Rebuild?

To successfully rebuild your flipper, you’ll need a selection of essential tools and supplies. Having the right DIY tools will make the process smoother and more efficient. You’ll also need a variety of replacement parts to ensure your flipper functions properly afterward. Consider gathering:
- Precision screwdrivers and pliers for disassembly and reassembly
- A multimeter to check electrical connections
- Replacement coils, switches, and rubber bumpers to restore parts that wear out
- Using high-quality storage conditions can prevent degradation of your replacement parts and tools over time storage conditions.
These supplies help you tackle common issues and ensure durability. Using quality DIY tools and suitable replacement parts reduces the risk of damage and saves time. Preparing these items beforehand means you’re ready to work confidently and effectively on your flipper rebuild.
How to Prioritize Rebuild Tasks for Efficiency and Quality?

After gathering your tools and replacement parts, organizing your tasks can make the rebuild process much more efficient. Start by tackling structural repairs first to ensure the core functions are solid. Next, focus on cosmetic enhancements like repainting and installing decorative accessories, which improve the look but don’t affect performance. Prioritize tasks that impact operation, such as checking electrical connections and mechanical parts. Reserve less critical work, like adding decorative accessories or minor cosmetic touches, for later stages. This approach keeps you focused on what’s essential for function and quality, preventing unnecessary rework. Understanding the importance of engine upgrades can also help optimize your vehicle’s overall performance. By sequencing tasks this way, you save time, reduce mistakes, and ensure your flipper not only works well but looks great with thoughtfully applied cosmetic enhancements.
Common Mistakes to Avoid When Rebuilding Your Flipper?

One common mistake to avoid when rebuilding your flipper is rushing through essential steps, which can lead to overlooked damage or improper repairs. Skipping proper flipper lubrication might cause excessive wear or sticking, while neglecting to check flipper spring tension can result in weak or overly strong flippers. To prevent these issues, focus on:
- Ensuring all moving parts are well-lubricated with the correct type of flipper lubrication
- Adjusting flipper spring tension to match the original specifications for peak performance
- Carefully inspecting for wear or damage before reassembling, avoiding shortcuts that compromise long-term reliability
Taking your time with these steps ensures your flipper will function smoothly and last longer, avoiding costly mistakes down the line.
How to Test and Fine-Tune Your Rebuilt Flipper for Top Performance?

Once you’ve completed rebuilding your flipper, testing and fine-tuning it guarantees peak performance. Start by checking the flipper lubrication; ensure the moving parts are well-lubricated to prevent sticking and reduce wear. Next, test the flipper’s response—push the button to see if it moves smoothly and quickly. Adjust the flipper spring tension if it’s either too weak or too strong; proper tension makes sure the flipper hits the ball with enough force without causing damage or sluggishness. Observe the flip angle and speed, making small adjustments as needed. Confirm that the flipper returns to its resting position promptly. Repeating these steps will optimize your flipper’s action, ensuring consistent, reliable performance during gameplay.
Frequently Asked Questions
How Often Should I Rebuild My Flipper for Optimal Performance?
You should rebuild your flipper every 1 to 2 years for peak performance, depending on usage. Following a regular maintenance schedule ensures it operates smoothly and prevents unexpected failures. Keep an eye on wear and tear, and don’t wait too long to service it. Consistent rebuilding and maintenance help enhance performance, extend lifespan, and maintain game quality. Remember, proactive care keeps your pinball machine in top shape!
Can I Use Generic Parts Instead of Original Manufacturer Components?
Yes, you can use generic replacements or aftermarket options for your flipper rebuild, but be cautious. While these parts can save you money, they might not match the quality or durability of original manufacturer components. Always research reviews and compatibility to make sure they fit properly and perform reliably. Keep in mind that using subpar parts could lead to more frequent repairs or issues down the line.
What Are Signs That My Flipper Needs an Urgent Rebuild?
Like a ship in turbulent waters, your flipper signals distress when you notice persistent issues. If it’s hard to flip, requires frequent cleaning, or fails flipper testing, it’s time for an urgent rebuild. Unusual noises or sluggish movements point to deeper problems. Ignoring these signs risks further damage. Regularly inspecting, cleaning, and testing your flipper can catch issues early, ensuring smooth operation before a major rebuild becomes necessary.
Is It Necessary to Replace All Parts During a Rebuild?
You don’t need to replace all parts during a rebuild. Focus on universal repairs for worn components and consider custom modifications to enhance performance or aesthetics. Some parts, like the flipper mechanism itself, might need replacing if they’re damaged, but others can be refurbished. Prioritize what’s necessary for safety and functionality, and customize where it adds value or style. This approach saves money and keeps your pinball machine in top shape.
How Long Does a Typical Flipper Rebuild Process Take?
Think of rebuilding your flipper like tuning a vintage guitar—precision matters. Typically, a flipper rebuild takes about 4 to 8 hours, depending on the extent of damage. During this process, you’ll focus on essential flipper maintenance to ensure parts like the solenoid and coil last longer. Rushing can jeopardize part longevity, so taking your time guarantees a smoother, more reliable game for years to come.
Conclusion
Rebuilding your flipper is like restoring a classic car—you’ll want to focus on the essential parts that keep it running smoothly. Skip unnecessary upgrades, but don’t ignore signs of wear or damage. With the right tools and a clear plan, you’ll turn your flipper into a well-oiled machine. Remember, patience and attention to detail are your best friends—because a finely tuned flipper is the crown jewel of your pinball machine’s kingdom.