
Pinball flippers operate by incorporating a combination of electrical currents and mechanical components. When the flipper button is pressed, it triggers a circuit that directs current through the high-power coil, causing the flipper to move and launch the ball. In contrast, low-power coils keep the flipper in place. The EOS switch regulates current flow to prevent overheating and ensure smooth functionality. Different flipper designs exist, with traditional machines employing basic circuits and newer ones incorporating advanced technology. To gain a better grasp of the mechanics and upkeep required, more in-depth insights can be found in the following section.
Key Takeaways
- Pinball flippers operate using solenoids, which consist of high power and low power coils for ball propulsion and positioning.
- Electric current activates the flippers when the button is pressed, providing the necessary force to kick the ball.
- Heat management is crucial; fuses and EOS switches prevent overheating during gameplay by regulating current flow.
- Flipper designs vary from old-school simple circuitry to modern systems like Fliptronics, affecting performance and responsiveness.
- Regular maintenance, including inspecting coils and wiring, ensures optimal flipper performance and longevity.
Overview of Flipper Mechanics
Pinball flippers are fascinating mechanisms that combine electrical engineering with simple mechanical design to enhance gameplay. At the heart of these flippers are double-wound solenoids, consisting of high power and low power coils. The high power coil, made with thicker wire and fewer turns, generates greater force when activated, launching the ball effectively. . On the other hand, the low power coil, with thinner wire and more turns, provides the holding force needed to keep the flipper in position when not in use. This sophisticated combination of electrical and mechanical components allows for precise control of the flippers, essential for accurate pinball machine operation.
Meanwhile, the low power coil, utilizing finer wire and more turns, consumes less energy to hold the flipper in position. To guarantee a smooth and enjoyable playing experience, players can also benefit from practicing yoga for back pain to alleviate any discomfort that may arise during extended gameplay sessions.
When you press the button, you complete a circuit that triggers the high power coil, sending the flipper into action. The End Of Stroke (EOS) switch plays a vital role here, managing the current flow to prevent overheating and guarantee smooth operation. This design allows you to hold the flipper up indefinitely without worrying about damage.
You can also adjust the leaf switches that determine how sensitive and responsive your flippers are. These adjustments can greatly influence your gameplay experience, allowing for precise control over how and when you interact with the ball.
Understanding these mechanics will enhance your appreciation for the intricacies of pinball machines.
How Solenoids Function
Solenoids often play an essential role in the operation of pinball flippers, providing the necessary force to control the movement of the flipper arms. Each flipper typically features two coils wound around a single core: a high power coil and a low power coil. The high power coil, made with thicker 25-gauge wire, has 600 turns and is designed for kicking the ball. In contrast, the low power coil uses finer 31-gauge wire with 1,000 turns, allowing for a lower resistance.
Proper maintenance of these components is critical for ideal performance, just as the proper maintenance of heat pumps can prevent failures and enhance efficiency reasons for heat pump failure.
When you activate the flipper, the high power coil generates a significant force to propel the flipper arm, but it also produces more heat. That's why careful management is essential to prevent overheating and potential damage.
The operation of the solenoids is regulated by an End Of Stroke (EOS) switch, which controls the current flow between the coils. This regulation guarantees that the flipper performs effectively without burning out.
Understanding the specifications and resistance measurements of these coils is fundamental for troubleshooting and maintaining your pinball flippers, so you can enjoy seamless gameplay.
Understanding Electric Current

Electric current plays an essential role in the operation of pinball flippers, as it directly affects their power and kick strength.
When you press the flipper button, the electric current flows to the flipper coils, activating the solenoids that propel the pinball. Understanding the importance of common financial terms can also enhance your decision-making in various investments, much like knowing how electric current impacts gameplay.
The strength of this electric current determines how effectively the flippers can launch the ball, impacting your overall gameplay.
Here are three vital aspects to understand about electric current in flippers:
- High vs. Low Power Coils: Flipper coils consist of a high power coil, made with thicker wire for lower resistance, and a low power coil, wound with finer wire for higher resistance. This design allows for varying flipper power depending on the gameplay situation.
- Voltage Readings: During operation, a typical reading of around 50AC voltage is detected when the flipper button is pressed, showcasing the electric current at work.
- Maintenance Checks: Proper maintenance often includes measuring the resistance of flipper coils with a multimeter to verify both coils are functioning correctly, optimizing flipper power and performance.
Heat Management in Flippers
When you play pinball, the flipper coils generate significant heat, especially during intense action.
To guarantee the longevity of the game and prevent overheating, machines incorporate fuses and use the EOS switch to regulate current flow effectively.
The presence of these safety measures is somewhat similar to how home security systems help deter potential threats and protect property.
Understanding these safety measures helps keep your game running smoothly without risking damage.
Coil Heat Generation
In the domain of pinball machines, coil heat generation is a critical factor that directly impacts flipper performance and longevity. The flipper coil, particularly the high power type, generates substantial heat during operation due to its thicker wire (25 gauge) and lower resistance compared to the low power coil (31 gauge).
This difference means that while the low power coil holds the ball, the high power coil quickly builds up heat, which can lead to serious issues if not managed properly. Understanding the importance of selecting the right components for your pinball machine can also enhance its overall performance, similar to the way one might consider cold medication options for effective relief.
Here are three important aspects of coil heat generation:
- Resistance Effects: The high power coil's resistance is about one-fourth that of the low power coil, leading to faster heat buildup when activated.
- Potential Hazards: Excessive heat can cause smoke, melting plastic parts, and even fire hazards, emphasizing the need for effective heat management.
- Heat Regulation: Strategies, like the End Of Stroke switch, help control current flow between coils to prevent excessive heat generation during gameplay.
Understanding these factors is essential for maintaining ideal flipper function and ensuring a long lifespan for your pinball machine.
Overheating Prevention Measures
To prevent flipper overheating, designers implement several effective measures that guarantee safe and reliable operation during gameplay. One of the key strategies is the use of dual power coils. These coils are designed with increased resistance to help regulate current flow and minimize heat generation. Additionally, the End Of Stroke (EOS) switch plays an essential role by managing the current between the high power and low power coils, securing efficiency without overheating risks.
Here's a breakdown of common overheating prevention measures:
| Measure | Description |
|---|---|
| Dual Coils | Allows for better heat management |
| EOS Switch | Regulates current flow to prevent overheating |
| Coil Resistance Checks | Confirms coils are functioning within safe limits |
| Proper Wiring | Prevents electrical shorts and overheating |
High power coils generate more heat due to their thicker wire and lower resistance, so careful monitoring is necessary. Regular maintenance, including checking coil resistance and verifying correct wiring connections, is essential for effective heat management. By taking these precautions, you can enjoy your pinball experience without worrying about overheating issues.
Fuse Safety Mechanisms
Fuses play an important role in the heat management of pinball flippers, acting as a safety mechanism that prevents damage from overheating. When electric current flows through the flipper coils, they generate heat, which can be problematic in high-stress gaming environments similar to the challenges faced in mastering bug out bags.
Without fuses, this heat can exceed safe limits, risking smoke or melting plastic parts.
Here are three key aspects of fuse safety mechanisms in pinball machines:
- Prevent Overheating: Fuses are designed to blow before the flipper coils overheat, protecting the overall system from damage.
- Correct Ratings: It's vital to use proper fuse ratings. Replacing fuses with incorrect ratings can lead to overheating and potential fire hazards, compromising the machine's safety.
- Dual Coil Design: The flipper coils incorporate increased resistance due to their dual coil design, effectively managing current flow and reducing the risk of overheating during normal operations.
Schematic Wiring Explained
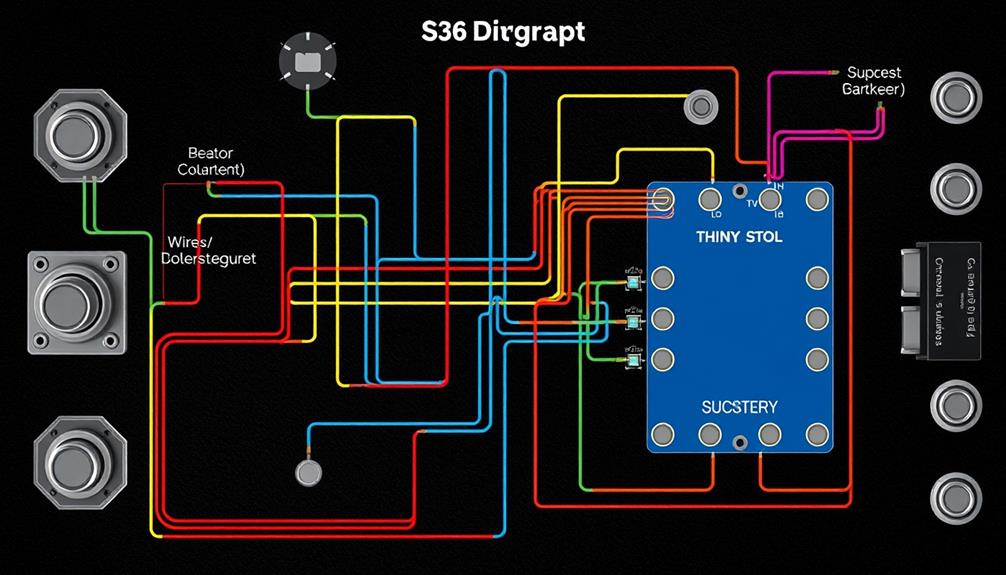
Let's break down the flipper coil wiring basics so you can understand how current flows through the system.
Different aspects of pinball machines, such as the interaction of Astrology and Attractiveness, can also be seen in the design and appeal of these games, influencing player engagement and enjoyment.
You'll see how different schematic variations can impact your pinball experience and maintenance routines.
Flipper Coil Wiring Basics
Understanding flipper coil wiring is vital for anyone looking to grasp the mechanics of pinball machines. The flipper coil consists of two distinct coils—a high power coil for kicking the ball and a low power coil for holding it in place. The wiring configuration plays an important role in how these coils operate, similar to how appliance maintenance plans can extend the lifespan of vital appliances through regular upkeep and inspections regular appliance upkeep.
Here are three key aspects to take into account regarding flipper coil wiring:
- Coil Configuration: In a serial coil setup, the high power coil connects to the left and center tabs, while the low power coil connects to the left and right tabs. This allows for specific functionality during operation.
- Independent Control: Parallel coil designs enable both coils to connect to their respective end tabs, allowing for simplified wiring and independent control of each coil's function.
- End Of Stroke Switches: The End Of Stroke (EOS) switch is essential for regulating current flow to the low power coil once the flipper reaches its maximum extension, ensuring the flipper operates smoothly.
Current Flow Pathway
The flipper coil wiring sets the stage for the current flow pathway, which is vital to how flippers operate in pinball machines. When you press the flipper button, you complete the circuit, allowing current to flow through the high power coil. This action kicks the ball into motion, much like how high refresh rates enhance gaming experiences in gaming projectors.
In the schematic, you'll see that the high power coil connects to the left solder lug, while the low power coil connects to the right solder lug.
The End Of Stroke switch, typically positioned across the low power coil, plays an essential role in regulating current flow. It's normally closed but opens when the flipper reaches its maximum upward position. This guarantees that the low power coil activates, holding the flipper in place without overheating.
When you're inspecting the flipper wiring, a thick wire on the left solder lug indicates a connection to the high power coil. Meanwhile, make certain that the normally closed End Of Stroke switch is properly connected across the low power coil.
This configuration is necessary for the flipper's proper operation and longevity, guaranteeing an enjoyable gaming experience.
Schematic Variations Overview
When you immerse yourself in pinball machine schematics, you'll notice distinct variations in wiring designs for flipper coils across different manufacturers like Gottlieb, Williams, Chicago Coin, and Bally.
Each design affects how the flipper button engages and how power flows through the coils, which is essential for maximizing content relevance and authority in your understanding of these machines.
Here are three key variations to take into account:
- Serial Coil Wiring: In this setup, the high power coil connects the left solder lug to the center tab, while the low power coil connects the left to the right tab. This arrangement influences how current is distributed, impacting flipper responsiveness.
- Parallel Coil Designs: Here, both the power and hold coils connect directly to their respective end tabs. This simplifies the wiring and enhances the functionality of the flipper button, ensuring smooth operation.
- Low Power Coils: Manufacturers like Chicago Coin label these coils as "Resistance," indicating their specific role in the circuit.
Inspecting solder lugs can help you identify the high power coil through wire thickness, ensuring correct connections for peak performance.
Understanding these schematic variations can enhance your appreciation of how pinball machines operate.
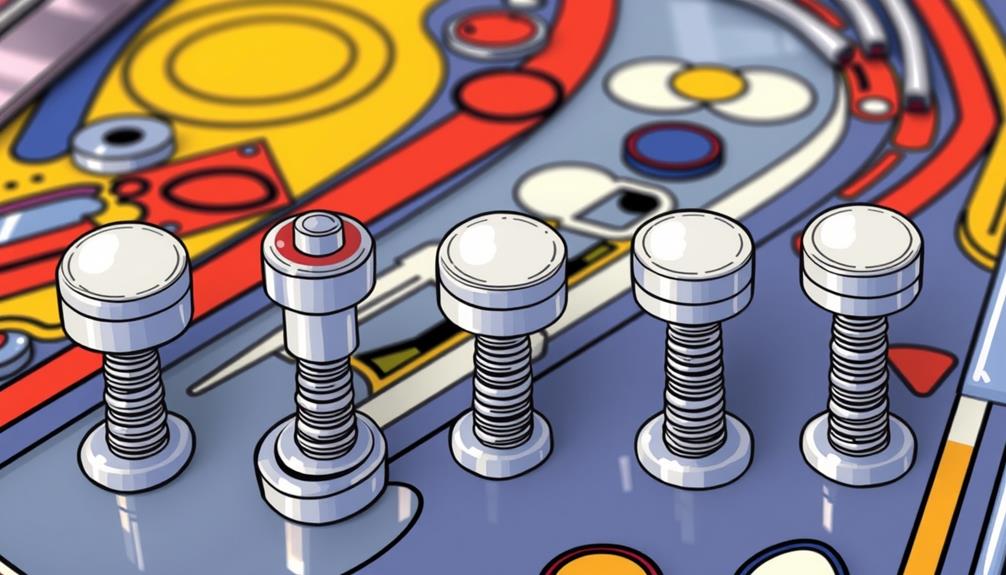
Types of Flipper Coils
Flipper coils play a pivotal role in how pinball machines operate, and they come in two main types: high power and low power coils. The high power coil, made with thicker wire, generates a strong kick to propel the ball. Typically, it has around 600 turns of 25-gauge wire, resulting in lower resistance compared to its counterpart.
On the other hand, the low power coil uses thinner wire and is designed to hold the flipper in position, featuring approximately 1000 turns of 31-gauge wire.
In terms of configuration, there are two main setups: serial and parallel. In a serial coil design, the high power coil connects from the left to the center tab, while the low power coil connects from the left to the right tab. This arrangement allows for distinct control over the flipper's action.
In parallel setups, both coils connect to their respective end tabs, altering the electrical characteristics and control of the flippers.
Understanding the differences between high power and low power coils, as well as their configurations, is essential for effective maintenance and repair of your pinball machine.
Identifying Flipper Designs
Identifying flipper designs can greatly enhance your understanding of pinball mechanics and improve maintenance efforts. By recognizing different types of flipper coils, you can guarantee peak performance and troubleshoot issues effectively.
Here are three key traits to help you identify flipper designs:
- Wiring Configuration: Serial flipper coils have two wires connected to the center tab, while parallel coils connect to the respective end tabs. This distinction is vital for understanding how power is distributed within the machine.
- Coil Specifications: Flipper coils vary by manufacturer, with Gottlieb, Williams, and Bally each providing unique schematics. Knowing these specs helps you identify which parts are compatible with your machine.
- Technology Type: Fliptronics technology, introduced by Williams/Bally, uses computer-controlled flippers. You can recognize these by their coil tab count, typically featuring only two tabs, distinguishing them from traditional setups.
Old-School vs. Modern Flippers

When you compare old-school and modern pinball flippers, you'll notice some key design differences that affect performance and reliability.
Old-school machines offer immediate response thanks to their simple circuitry, while modern systems provide enhanced control through advanced technology like Fliptronics.
These differences can greatly impact your gameplay experience, so it's worth understanding how each system works.
Design Differences
There are notable design differences between old-school and modern pinball flippers that can greatly impact gameplay. Understanding these differences can enhance your playing experience and strategy.
1. Circuit Design: Old-school flippers use a simple circuit with one solenoid driver channel, resulting in zero latency between your button press and flipper activation.
In contrast, modern flippers often employ advanced systems like Pulse Width Modulation (PWM) to manage flipper power more efficiently.
2. Wiring Complexity: Vintage machines rely on extensive wiring for power, ground, and buttons, which can lead to maintenance challenges.
Modern flipper designs simplify this with direct connections and fewer components, making it easier to troubleshoot.
3. Control Mechanisms: In old-school setups, high-power contact switches and relays govern flipper action.
However, modern designs enable independent firing of the power and hold coil, allowing you to fine-tune flipper settings based on your preferences.
This adjustability guarantees that once the flipper has reached its peak power, it can maintain control for a better game experience.
These design differences not only affect how you play but also how you engage with the game's mechanics.
Performance and Reliability
While both old-school and modern pinball flippers aim to enhance your gaming experience, their performance and reliability can vary greatly.
Old-school flipper systems feature a straightforward circuit design with direct connections, meaning you get zero latency between your button press and flipper activation. This responsiveness boosts gameplay, but it comes with limitations. The wiring complexity can be overwhelming with extensive connections for power, ground, and buttons.
On the other hand, modern flippers, especially those using Solid State Fliptronics technology, offer more nuanced control. They allow independent firing of power and hold coils, greatly improving your ability to manipulate flipper actions.
Additionally, modern setups handle high current surges more efficiently, a common issue with older machines that rely on single solenoid driver channels.
Moreover, when it comes to adjustability, old-school machines fall short. You can't fine-tune flipper power settings like you can with modern systems, which enable software and hardware modifications for peak performance.
To conclude, if you're seeking reliability and advanced performance, modern flippers are the way to go.
Troubleshooting Common Issues

Troubleshooting common flipper issues can save you time and frustration. If you're experiencing non-responsiveness or weak action, start by checking the flipper coils and wiring.
Here are three steps to help you diagnose the problem:
- Check Voltage: Use a multimeter to measure the voltage at the flipper coil while pressing the button. You should see around 50AC voltage. If not, there may be a wiring issue or a faulty button.
- Inspect Components: Examine the flipper button and relay switches for proper functionality. Verify there's continuity in the circuit to rule out any connection problems.
- Test Resistance: Compare the resistance readings of your flipper coils to a functioning coil. Discrepancies can indicate failure and help pinpoint the issue.
Regular maintenance is key, too.
Cleaning relay contacts and lubricating pivot points can enhance performance and prolong the lifespan of your flippers.
Resources for Further Learning
For anyone looking to deepen their understanding of pinball flippers and their mechanics, numerous resources are available. By exploring various platforms, you can gather valuable insights and practical knowledge. One way to learn more about pinball flippers is to study the pinball manufacturing process. Understanding how flippers are designed, manufactured, and installed in a pinball machine can provide a comprehensive understanding of their mechanics. Additionally, reaching out to pinball enthusiasts, joining online forums, and attending pinball conventions can also provide valuable information and connections within the pinball community.
| Resource Type | Description | Link/Access |
|---|---|---|
| Things to Learn Page | Extensive info on pinball components | [Visit Here](#) |
| YouTube Tutorials | Visual guides for testing flipper systems | [Search YouTube](#) |
| Online Forums | Community tips and troubleshooting advice | [Join a Forum](#) |
| Wiring Guides | Insights on NO and NC end-of-stroke switches | [Read Wiring Guides](#) |
| DIY Projects | Templates and Arduino ideas for custom builds | [Explore DIY](#) |
These resources collectively enhance your grasp of flipper mechanics. Engage with the community, watch tutorials, and immerse yourself in the technical guides to troubleshoot and optimize your pinball experience. By leveraging these tools, you'll not only improve your understanding but also gain practical skills that can elevate your pinball machine projects.
Frequently Asked Questions
How Do Pinball Levers Work?
When you press a pinball lever, it activates a switch that sends power to coils, causing the lever to move. This movement propels the ball, enhancing your gameplay experience with strategic timing and precision.
When Should I Rebuild My Pinball Flippers?
You've noticed your flippers acting up, right? If they're weak, stuck, or noisy, it's time for a rebuild. Regularly inspect them for wear; addressing issues early can save you from bigger problems later.
What Is the Voltage of a Pinball Flipper?
When you consider the voltage of a pinball flipper, it typically ranges from 36V to 48V for ideal performance. Higher voltages kick the ball while lower ones hold it, ensuring a responsive gameplay experience.
How Do You Test a Pinball Flipper Coil?
Picture a vibrant carnival, lights flashing. To test a pinball flipper coil, power off the machine, check resistance with a multimeter, inspect connections, and verify the button switch completes the circuit. Troubleshoot effectively for a smooth game!
Conclusion
In conclusion, understanding how pinball flippers work can really help you appreciate the game on a whole new level. By knowing the mechanics behind the solenoids and electric currents, you can troubleshoot issues like a pro. Whether you're playing an old-school machine or a modern one, these insights will keep you ahead of the game. So, don't just wing it—dive deeper and have a blast flipping those balls around!