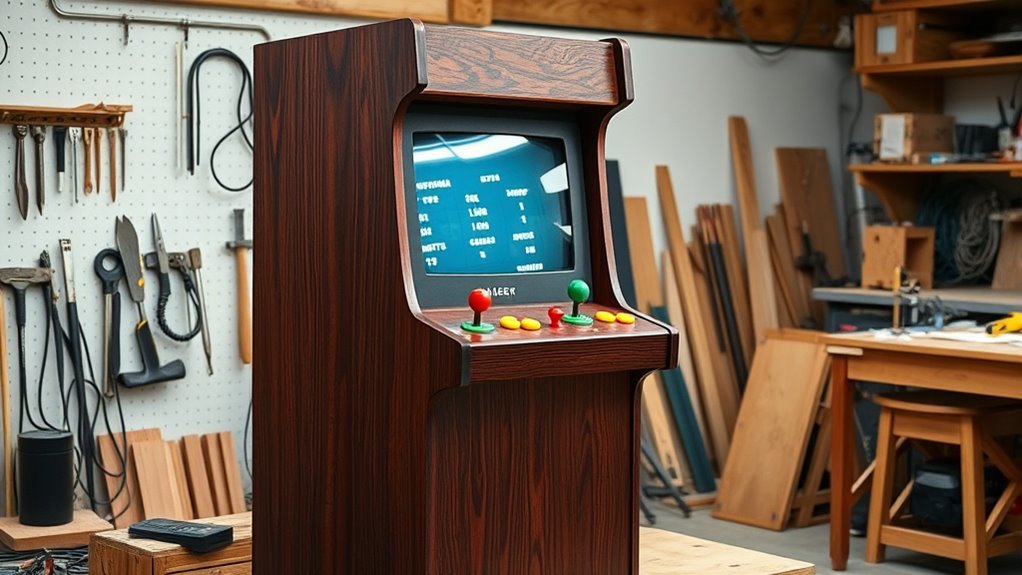
Building your own arcade cabinet from scratch involves carefully calibrating your joystick to guarantee smooth, responsive controls, and designing effective ventilation to prevent heat buildup during extended play. You’ll need to test and fine-tune both the controls and airflow systems for peak performance and durability. Balancing functionality with a polished aesthetic makes the experience more authentic. Stay with us to discover detailed steps that will guide you through each essential process for a successful build.
Key Takeaways
- Plan and design your cabinet layout, including space for controls, display, ventilation, and electronics.
- Select high-quality components like joysticks, buttons, and a suitable display, ensuring compatibility and durability.
- Calibrate and test the joystick thoroughly for responsiveness and accuracy before final assembly.
- Incorporate proper ventilation with intake/exhaust vents and maintain them regularly to prevent overheating.
- Assemble all parts carefully, test controls and airflow systems, and fine-tune for optimal performance and longevity.
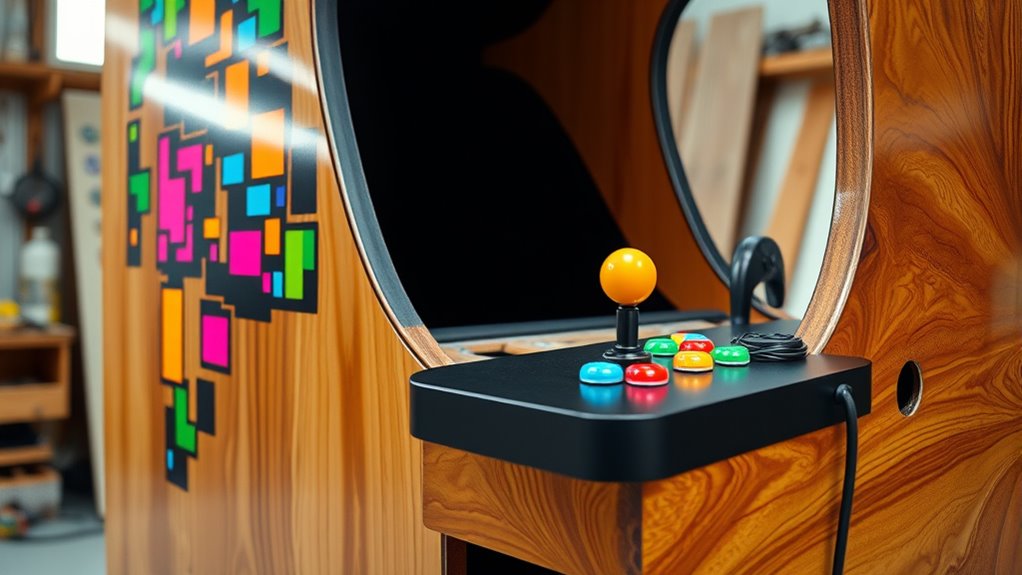
Creating your own arcade cabinet from scratch is an exciting project that allows you to customize your gaming experience and bring a classic arcade feel into your home. As you start assembling, paying close attention to joystick calibration is essential. Properly calibrated joysticks ensure your controls feel responsive and accurate during gameplay. To achieve this, you’ll need to adjust the sensitivity settings and test the joystick’s movement across all directions. Use calibration tools or software to fine-tune the input, making sure that every movement registers correctly on the screen. This step is *paramount* because a poorly calibrated joystick can frustrate players and diminish the overall experience. Take your time to test multiple games, ensuring the calibration feels natural, and make adjustments as needed until every input feels seamless.
Another *indispensable* aspect to consider in your build is cabinet ventilation. As your arcade cabinet runs for extended periods, heat can build up inside, potentially damaging electronic components or causing overheating. You’ll want to incorporate adequate ventilation solutions from the start. This might involve installing intake and exhaust fans, or designing vents into the cabinet’s structure that allow air to circulate freely. Proper ventilation keeps internal temperatures stable, prolonging the lifespan of your hardware and maintaining consistent performance. Additionally, good airflow prevents the screen from overheating, which can cause display issues or damage over time. When planning your cabinet design, think about placement—avoid sealing off vents or blocking airflow paths, and consider using filters to prevent dust buildup inside the enclosure. Regular maintenance, like cleaning vents and fans, will also help *guarantee* your cabinet stays cool and functions reliably. Incorporating proper cooling solutions can significantly improve the longevity and performance of your build.
Building your own arcade cabinet is about balancing functionality with style. The calibration process might seem tedious at first, but it’s worth the effort to get precise control. Meanwhile, paying attention to cabinet ventilation is *essential* to keep your hardware safe and operational for years to come. As you proceed, test each component thoroughly—calibrate your joystick with patience and *verify* your ventilation system is effective. When everything comes together, you’ll have a custom arcade cabinet that not only looks authentic but also performs flawlessly, providing countless hours of nostalgic gaming fun. Remember, these details make a *meaningful* difference in your overall experience, so don’t rush through them. Instead, take pride in fine-tuning your creation to get it just right, blending classic arcade charm with modern reliability.

EG STARTS 2 Player Arcade Games DIY Kit Parts 2 Ellipse Oval Joystick Handles + 20 LED lit Arcade Buttons (Red & Blue Kit)
Exquisite LED arace game DIY MAME parts selection!
As an affiliate, we earn on qualifying purchases.
As an affiliate, we earn on qualifying purchases.
Frequently Asked Questions
What Are the Best Tools Needed for Arcade Cabinet Construction?
You’ll need essential tools like a drill, jigsaw, screwdriver, and a level for arcade cabinet design. A saw helps with cutting wood panels, while clamps keep pieces steady during assembly. For monitor mounting techniques, use a stud finder and brackets to secure the monitor safely. Additionally, sanders and measuring tapes ensure precise work. With these tools, you can confidently build your perfect arcade cabinet from scratch.
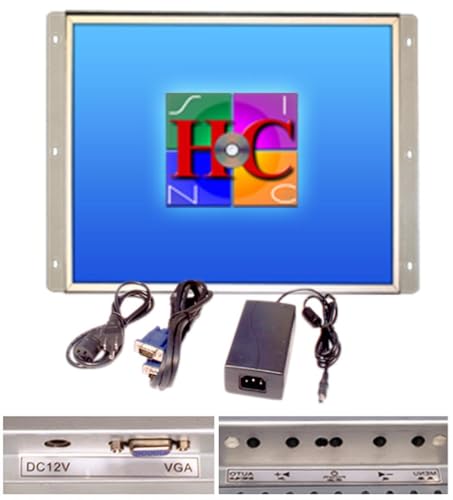
How Do I Choose the Right Screen Size for My Cabinet?
Did you know that 32-inch screens are the most popular for arcade cabinets? When choosing your screen size, consider your cabinet dimensions and how much space you have. Larger screens provide immersive gameplay but might require a bigger cabinet, while smaller screens fit more compact setups. Balance screen size considerations with your space and budget to create a comfortable, visually appealing arcade experience that suits your gaming style.
What Safety Precautions Should I Follow During Assembly?
You should prioritize electrical safety by disconnecting power sources before working on wiring or electronics. Always handle tools carefully, wearing safety glasses and gloves when necessary, to prevent injuries. Keep your workspace organized to avoid accidents, and follow manufacturer instructions for all equipment. Never rush, and double-check connections and tool settings to guarantee safe assembly. Staying alert and cautious reduces risks and helps you build your arcade cabinet safely.
Can I Customize the Arcade Cabinet’s Artwork Easily?
Think of your arcade cabinet as a blank canvas waiting for your masterpiece. Yes, you can easily customize the artwork by designing your own or choosing decals. Applying custom artwork is like adding vibrant colors to a painting—just carefully peel and stick the decals or print your custom design on adhesive paper. With patience, your cabinet will reflect your unique style, turning it into a true personal arcade treasure.
How Do I Set up and Configure the Emulation Software?
To establish and configure your emulation software, start by installing your chosen emulator on your system. Then, delve into the emulation setup by selecting the correct BIOS files and configuring input devices like joysticks and buttons. Adjust video and audio settings for peak performance. Finally, organize your game ROMs, and test the software configuration to guarantee everything runs smoothly, making tweaks as needed for a seamless arcade experience.

GDSTIME 120mm Waterproof Fan with Speed Controller, IP67 12V Computer Fan with AC Plug, 110V 120V 220V AC Powered Ventilation Exhaust Fans for Receiver Terrarium Biltong Box Grow Tent Cabinet Cooling
Waterproof Fan with Speed Controller: IP67 rating 120mm computer fan with ac plug are built to withstand the…
As an affiliate, we earn on qualifying purchases.
As an affiliate, we earn on qualifying purchases.
Conclusion
Now that you’ve built your own arcade cabinet, you’ve proved you’re a passionate, persistent pioneer of play. With your craftsmanship, creativity, and courage, you’ve created a mesmerizing corner of classic comfort. Keep customizing, tinkering, and transforming your space into a nostalgic nirvana. Remember, your masterpiece isn’t just a machine—it’s a monument to your mastery. So, step back, salute your skill, and enjoy the endless excitement you’ve expertly engineered. Your arcade adventure has only just begun!
19 Inch Arcade Game LED Monitor, Jamma Monitor MAME and Cocktail Game cabinets
As an affiliate, we earn on qualifying purchases.
As an affiliate, we earn on qualifying purchases.

ASUS ProArt CaliContrO MCA02 3-in-1 Colorimeter – Professional Color Calibrator, Hardware/Software Monitor Calibration Up to 10000nits, Display OSD Control, Dial, Adobe Software Compatible
3-in-1 multiple function with Colorimeter, Display OSD control and ASUS Dial features
As an affiliate, we earn on qualifying purchases.
As an affiliate, we earn on qualifying purchases.